There are two sides to plumbing - fresh water comes in, used water goes out.
At this stage, from the outside, the house is looking finished. But on the inside, nothing but stud walls! To give your house more of a homey feel, you need to get up the plasterboard. Now there are things you need to do prior to putting up plasterboard - things that need to run through the walls. Plumbing is one of them.
So...you catch water off the roof into a big tank. That water is then pumped around the house to all your water taps (some of it is heated even). Waster water then leaves the house into a septic system. All of these things require a licenced plumber to perform - except catching water into the tank, but everything after the tank does. I repeat, you need to have all water and waste water plumbing performed by a licenced plumber.

Two septic tanks.
Now that I have that out of the way, let's talk plumbing.
The average owner builder would have got water on tap happening even before construction started. I guess I'm not average. I got onto the septic system once the house structure was complete, simply because I knew it would take a long time to get done. Shires are pretty strict on septics. You need to apply for one, they need to inspect it before it is filled in, it needs to be signed off by both a licenced plumber and the council before the first drop of water goes into it.
During application I had drawn up a septic system that was over specified for the Shire of Manjimup. Once the area where the septic was cleared I discovered the slope of the land was beyond what I allowed for, so in confusion of what to do I got the shire environmental officer in.
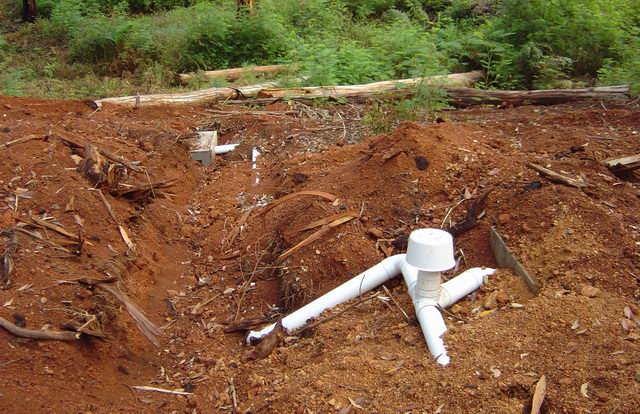
Diverter value and leach drains (buried already).
It was a good move - he walked the block with me, showed me the best place to put the leach drains and said "This is karri loam country, no dramas with drainage, just sink the leach drains into the ground and bury them." Excellent!
I then managed to track down "the best plumber in the area". Okay, it took him 6 months and a fair bit of nagging before it was completed, but he did a really good job. It came up much better than I expected. I thought it was going to be an ugly eyesore but no, you hardly even know it was there.
I also had him put in the main drainage backbone plumbed up to a dunny I supplied. I faxed him the plan of what I expected the drainage was going to look like and got him to put some Y's in the logical places so I could later add trough/sink/bath drainage...
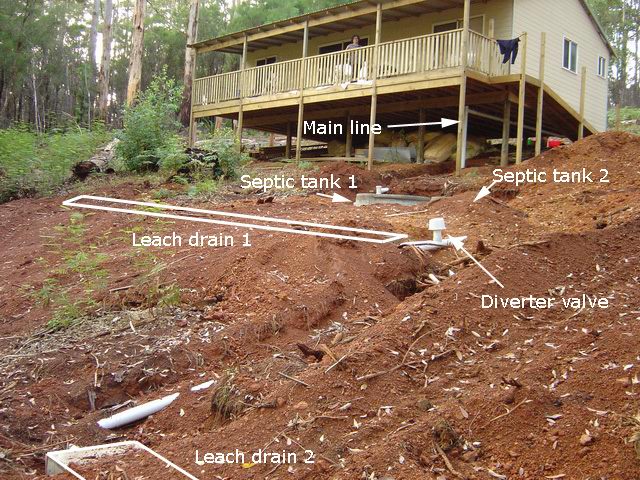
Complete system.
Note: Operation of Septic system (for the un-initiated): Dirty water goes into first tank, solids sink to the bottom. The bugs digest all the, um, bio-matter. As more water enters, it flows over into the second tank. Not as much solids make it into the second tank (unless the first is full! - should be pumped clear of solids before it fills up). The bugs digest in there too. Water flows out of the second tank and towards the leach drain. A diverter gate sends water to just one of the leach drains, where the water leaches into the ground. It is basically nasties-free by now. Every six months or so you should switch which leach drain you use so that you don't overload the one spot with your dirty water...
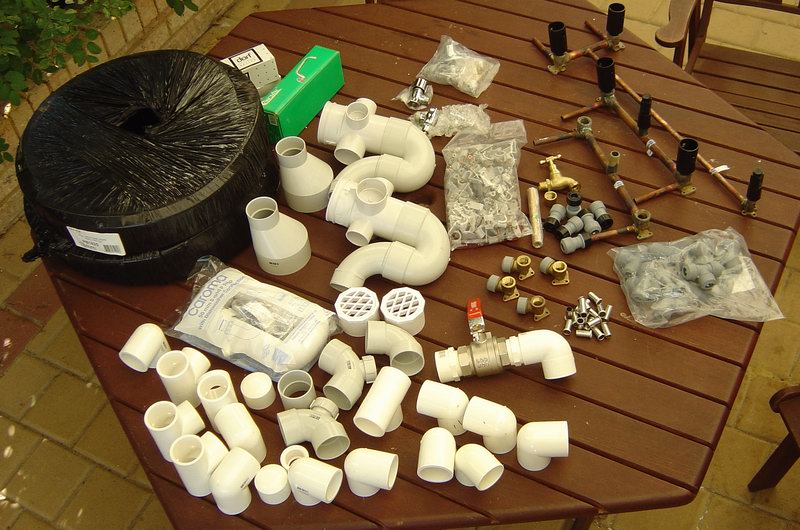
After a trip to the local plumbing supplies...
Adding the trough drain to the main line.
It became a simple job then to hook in the trough. I took off the cap on the Y, added a reducer, some pipe and bends and finally an s-bend into the bottom of the trough. Too easy! Now, there are specifications as to how/what to do but to be honest it is common sense. For starters, you make sure everything runs downhill into the septic system. Well duh. I believe 2� is the correct angle. The pipe to use is called DVW, it is gray - you don't use the white pressure pipe, that's for pumping fresh water under pressure. There are standard sizes of DVW and they *are not* interchangeable with the white pressure pipe, ie, you must use DVW bends and T's with DVW pipe, pressure pipe bends and T's will not fit.
Even the pipe glue is different - green glue for pressure and blue glue for DVW. If you've never glued PVC then you should stop reading now, go and do some reticulation around your house to get your skills and understanding up.
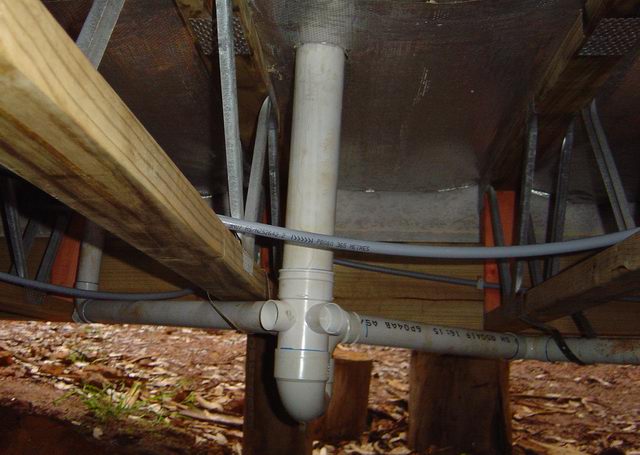
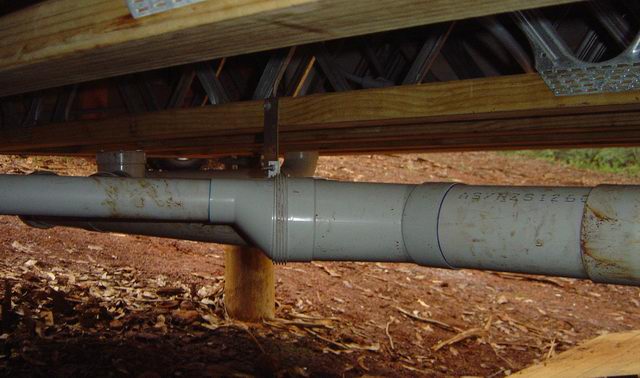
Christmas tree - up to the floor waste,
left and out to the trough,
right to the main septic line.
Here's the details. I reduced from 100m to 50m out of the main line (note the orientation of the reducer). Some pipe and bends brings me to a "Christmas tree"; basically an s-bend and multi-collection point with a floor waste. The top is 80mm pipe and a little grill on the floor. So, if you spill water on the floor, it runs down the waste and into the s-bend. Once the s-bend is full, it runs into the main line.
As-built schematic.
What's the s-bend for? Well, this one is to create a water trap so that the stinky smell can't waft out of the septic system and into the house. Now, the trough also has an s-bend before it goes (40mm) through the floor and hooks into the christmas tree. That s-bend isn't really necessary for smellage, but if you drop your wedding ring down the trough it sure helps recovery; the trough s-bend is removable.
So waste water comes out of the bottom of the trough, into a trap (s-bend) through the floor, into the floor waste trap, then into the septic. The floor waste trap gets the advantage of being flushed with "fresh" water from the trough (and anything else connected to the Christmas tree) which is good - otherwise the water from spills on the floor would go feral (how often do you spill water on the floor?).
There isn't much extrapolation required to imagine the sink, basin and bath so lets move on to the next part of plumbing, getting the water...