If you have a house on the side of a hill, you simply must build a deck. The Deck is the best place in the world. I love The Deck!
It stands on its own posts, which are concrete/stirrup'd into the ground, then joins back onto the main structure. You'd call it a skillion or lean-to, in builder-speak.
I started by running a stringline along the ground. I spent quite some time organising it so that when the deck posts were vertical, they would all be the same distance from the house. Unfortunately, once I'd concreted in the stirrups and stood the posts up and temporarily braced them vertical, I had a 15mm run out over the deck distance. That run out caused me grief later on. I should have cut the posts into the stirrups to correct that 15mm while I had the chance!

Concrete in the stirrups.
Standing up the 5.4m posts was, ahem, interesting. I braced them, then grabbed the dumpy level to mark off the height for the deck beam. Lay them back on the ground, cut a notch in them, stand them back up again. Beam then gets bolted to the post and the posts bolted into the stirrups.
The height of the beam is such that when the deck joists (the wood that runs out to join up to the house) are added, then the reeded decking added, the height is about 10mm lower than the house floor level. Water not to run inside, huh.
The house side cops a plate of wood for the other end of the joist to sit on. I didn't think hard enough about the deck joists. I cut them to the "right" length, installed them so that they were flush with the front of the post and nailed them.
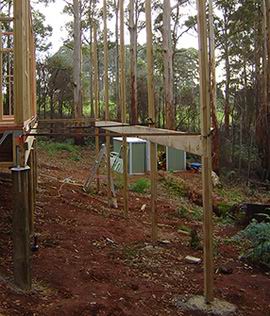
Posts go up, temporarily braced.
Then discovered they should be flush with the front of the beam, and proceeded to cut off 45mm in situ. Which was a shame because they could have extended them further under the house for more length to attach them to the house frame.
If I was going to do it again, I would push them up hard against the house so some nails go into the truss ends as well as the plate, and cut the other ends off flush with the front of the beam. Anyway, that probably doesn't make any sense and really it doesn't matter, I'm just being a perfectionist, so lets move on!
I counted how much wood I had for joists and calculated how far apart to space them. The kit manufacturers had been pretty generous with wood in most places, so I have more joists than required. Can't be a bad thing can it?
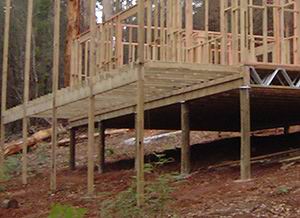
Running out the deck joist.
Well now it was time to put the verandah beam up. This meant cutting the tops off the posts at the right height and notching in the beam. No dramas, just yet another thing that requires two people. In go the bolts and you're done.
The verandah roof has a tiny slope for rain runoff, so I cut the verandah beam in at a suitable height for the verandah rafters & purlins for the desired roof pitch.
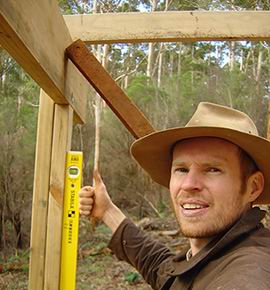
Verandah beam nice'n'plumb.
I made a conscious decision NOT to install the gutters straight away, reason being that I didn't want all the water to run off in one spot and cut a big gorge down the hill. In fact, I wanted all the water to go into a water tank which I didn't have. So I decided to leave them off. A bad call, because later on I had to lift the roof sheets to get the gutters on - you really need gutters, or as a minimum the gutter clips, on before you put on the roof!
The decking itself. Well I got my Deck Worker to do all that ;) Decking must butt join on a joist. Decking must be a minimum of 3mm apart. Decking must be held down with distorted shank nails or screws, two per joist. After a few calcs I nipped into town and bought 5kg of 50mm timberlock galv nails, with pretty domed heads.
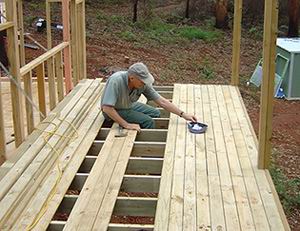
Deck Worker.
I made a few spacers out of some plastic strip I had laying around, 4mm wide and set the Deck Worker on the task. In between helping me lift stuff into place, it took him about 2 days to put in the 1500-odd nails in by hand. Nice job too.
One drama we discovered is that some of the deck slats were put down bone dry. They then got soaking wet. In some places, the CCA pine slats actually swelled to fill the 4mm gap! I recommend going to at least 5mm or more gap between them. Once the roof was over the deck the slats dried up a bit and the gap returned, so visually it looks fine. Try to ensure the deckings slats are all the same "wetness" when installing and keep the gap wide!
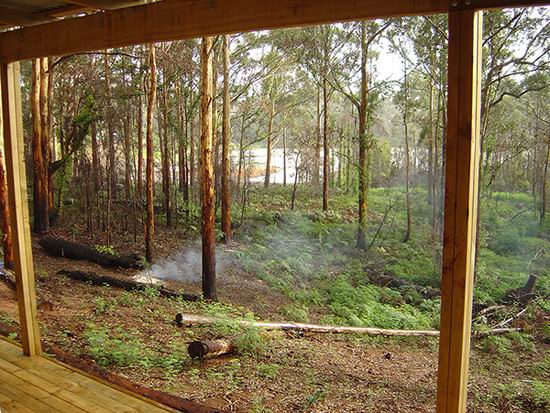
Love the view from the deck.