If you have the right type of dirt, a standard "stockyard" dam is an excellent and reasonably cheap investment you can add to your land. Interestingly, the very last thing required to be in place before the house was signed off was water. A building caveat was 100,000L of water must be available. I'd already put in a 23,000L tank which was more than ample for the amount of water we were using; I'd made enough room to fit two of them side by side, but at $AUD2,800(2007) per tank I didn't want to have to get more just yet.
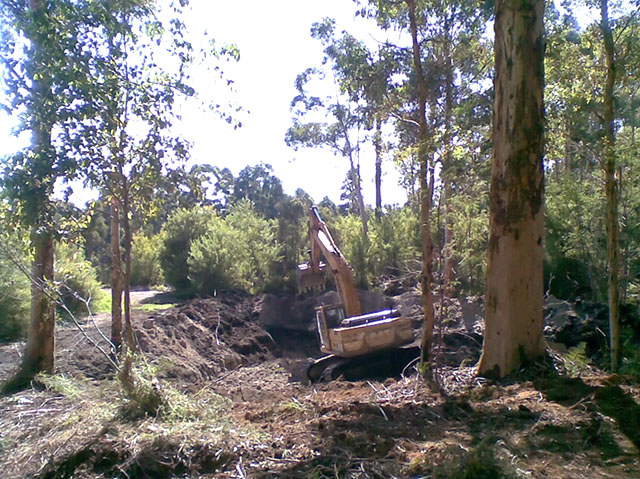
Getting started in the target area.
So I said to my building inspector, "I don't need the extra water right now, what else can I do to meet the requirement?" He said "Put a dam in!" I said "with a pump, and pipes up to the house and all that?" "No, the water just has to exist on the block."
Well, that is pretty straight forward - just get a hole dug - caveat met, house signed off!
Now at the time I already knew that a dam isn't just a hole in the ground, it actually requires a bit of understanding of what a dam needs to be to catch and hold water. You can't just get a bulldozer to push around some dirt and expect it to be a dam. I've seen successful dams, and I've seen unsuccessful dams. So, I got in touch with some experts.
Digging...
On my block there is a soak/semi winter creek; there are areas that are permanently wet, and areas that get wet during winter. All of which ends up flowing down to the back end corner of the block. It makes that area pretty much useless to me so it seemed like the perfect place to have the dam. What's more, there was a natural ridge and drop off, a few big karris on the top of the ridge and no karris in the lower area.
The earthworks guys (T.L. Dozing) came around and I showed them the target area. It was a mess - you could hardly walk through the weeds, swampyness and forest regrowth, but they got the idea. Fortunately there was a boundary peg in the corner of my block, so we could see where it needed to be. Everything seemed to be right according to the guys:
- It's karri country, so there will be white clay around there somewhere. White clay is the best clay to line a dam with.
- The dam is basically going to be in a watercourse, an underground one at least, so there will be no shortage of water to fill it.
- It will be an excavated dam, not quite a gully wall dam. (Gully wall dam means building a single wall across a watercourse and letting the water back up into the gully. An excavated dam basically means digging a hole, using the dirt to make the walls all around the hole. But since the location was in a naturally dropping off area, only two walls needed to be made, the dam being roughly a triangle.)
- The biggest dam one machine operator in one normal sized machine can make will take about 2 days, it's your "standard stockyard 1000 cubic metre dam". Anything bigger than that and you need to start having other equipment to move the excavated dirt around. The area for this dam was only about half of the area required for a 1000 cubes, so it's about a day's activity. So at AUD$150/hr(2007) plus machine delivery you're looking at a $1,500-$2,000 exercise.

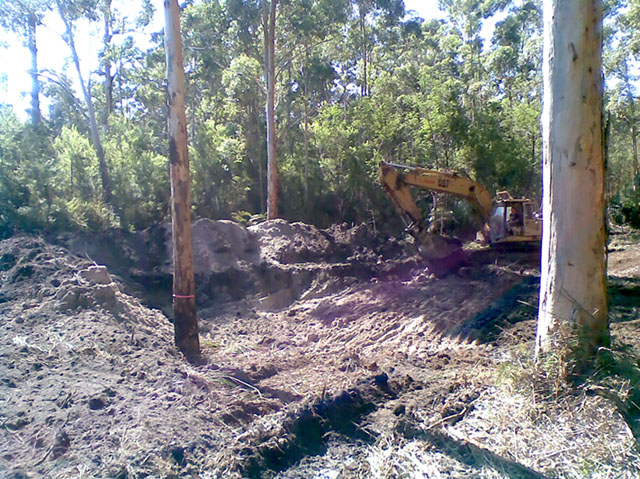
Finishing off from the wall
So in came a 20T excavator, one scoop is around 1T of dirt. As you'd expect, I watched the guy with much interest :)
Firstly, he cleaned up the area so he could see where he was going, and then started digging. The dirt was piled where the two walls were planned to be. The dirt really surprised me. First there was the red/brown loamy topsoil. Next came a layer of jet black peaty dirt, about a metre. And then, pure white! Very gritty, he called it "shale". As he dug out the shale I noticed he was leaving random areas undug. I quizzed him about it while he was having a break, the undug areas were knobs of white clay. Basically, in amongst the shale where big areas of white clay. He was leaving them aside there so that when he got close to the end, he would dig them up and use it to line the walls. Very clever!
Because of the small area he made the walls very steep, digging deeper than he normally would. I did a rough calc later on and worked out the dam was around 450 cubic metres. The walls were as wide as the machine, I thought that seemed unnecessarily wide, but it all made sense as he got towards the end. Once he'd dug himself to bottom of the hole, he continued digging while slowly backing out of the hole, he then moved to working from the tops of the walls. He would drive back and forward along them, reaching in to the maximum extent of the excavator arm. Again, very clever!

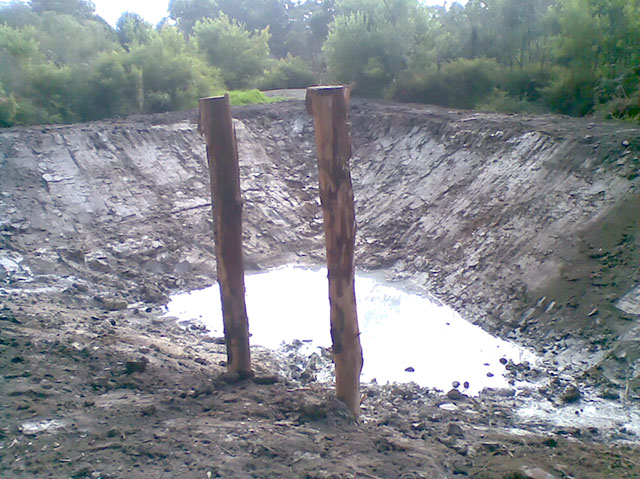
Putting in jetty piles;
notice laser level in background
I noticed there was water gathering in the bottom already. He mentioned to me he was watching carefully as he went - he'd been in similar situations where he'd burst open a natural underground "water pipe" and water came gushing in - he'd have to be ready to get out as quick as he could!
Once he was satisfied with the main excavation, he swapped out the digging bucket with what he called a "batter bucket", a much wider but shallower, smoother bucket. With that he scooped up lumps of clay, and smeared them all throughout the dam. To line the walls, holding water in. All from the tops of the walls. You could tell he'd done it all before :)
Next he set up a laser level, and walked around the edges, working out where he was high, and low, and where the spillway was going to be. He then did more digging to sort out the walls so they were all level, checking the levels by laser as he went, and creating the spillway. He wanted to spillway to be at least 200-300mm down from the full height, and made it so it was quite a long slow drop out of the dam. All dams need to have a spillway for overflow - if not done correctly, the water will start to eat out the spillway, making it deeper, so that more water will overflow, making it deeper again...until the whole spillway has eroded and there is no water left in the dam! He clay battered the spillway as well, making it more difficult to be washed out if a lot of water was overflowing.
Completed dam, around
4-5m deep in the middle
I had a little request of him, which he thought quite amusing, kind of a "you crazy city slickers" sort of amusing. I wanted him to put two piles into the long side of the dam so that I could later build a jetty. Someone mentioned that if I wanted a jetty, it is best to get it in before the dam is full of water. So he went to some lengths to dig a hole, chain lift two logs in, knock them down and backfill them. Later on I put a brace between them, and pulled two stringers out to the end, but that is a different story :)
So about 8 hours of work by the machine, including my jetty piles. I was pleased with the result. He said it will take a year or two for the clay in the walls to settle down, which was correct - the walls leaked a small amount for the first year, and then were hard as a rock thereafter. It only took just under 6 months to fill until overflowing, and it stays full for around 9 months of the year. An no, I still don't use any of the water for the house. Maybe one day!
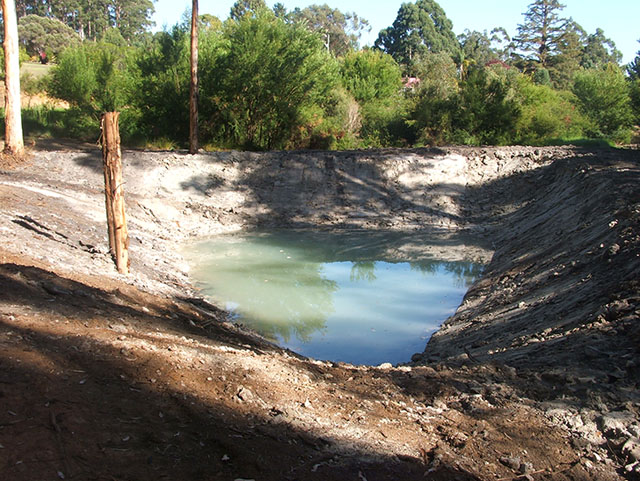
After about 3 months...
He thought the dam would settle nicely and possibly be a nice blue colour due to the amount of blue clay in with the white clay, but what has actually happened is it has remained murky. This is probably due to the water birds that walk the edges of it, stirring it up, and the colloidal nature of the white clay. To be honest, that's actually worked out quite well, I think it's helped make it harder for the shags to find and eat the marron currently living in it - yet another story!
So if you need some water, get in guys who know what they are doing, it's cheaper than you'd think (well, cheaper than rainwater tanks) and when done "artistically" it can be something really interesting, a "water feature". I find the kids and I spend a lot of time down there checking out the various critters that live in it - both natural ones and the ones I have introduced, like marron and trout for instance :)

...full after 6 months; jetty structure done but not planked -
I'll get to that once all the kids can swim!