Kitchens are the life blood of any home.
These days, kitchens are much easier to DIY as flat-packs have become more widespread and better quality. Flat-packs, that is, a box of pieces that you assemble into modular components that build up your kitchen make the design and install of your kitchen easy. Back in the day you would design a kitchen and a cabinet maker would build it. Now you'd use an online drag and drop program to arrange a kitchen, then click the parts list, and it tells you what flat-pack boxes you need to buy.
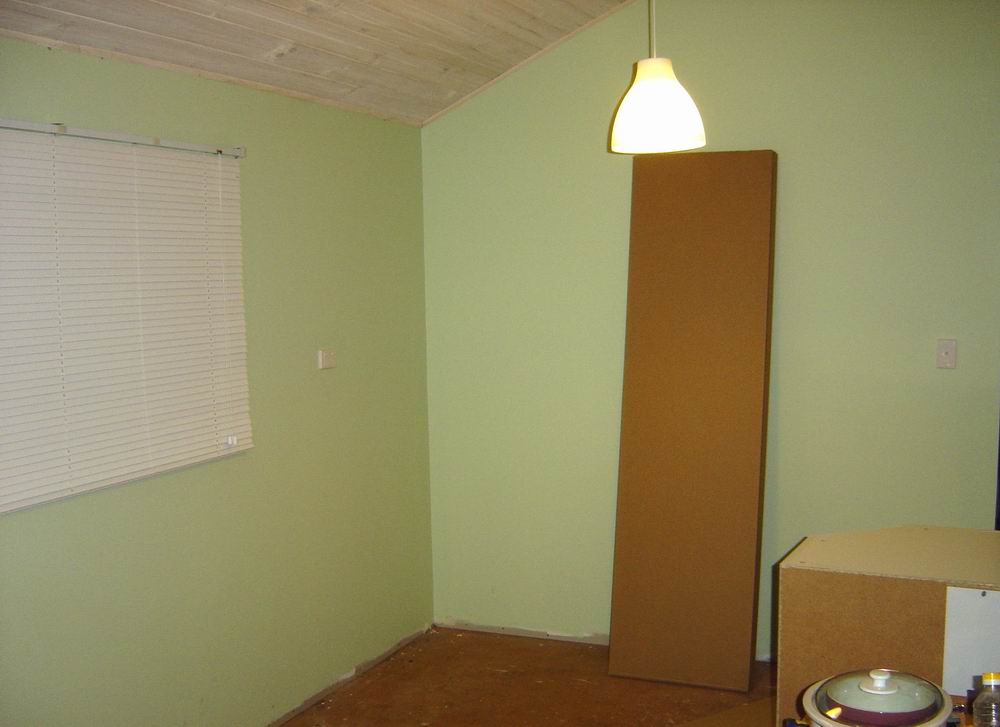
A blank area ready to receive a kitchen.
My wife after looking around decided on an IKEA kitchen. It was 2007 and there were a few players in the flat-pack kitchen game, but IKEA was already well established in that game. She used their software, worked out which modules she liked and were going to fit best. She had designed quite a glorious kitchen, it came to around $AUD8k (2007). As with everything with Project Pemberton, getting it to site is a difficulty. We arranged with IKEA to have it all packed and wrapped on a pallet, and arranged with a transport company to have it shipped down to the local depot which happened to be the hardware store. From there I had it forklifted onto my trailer, and took it home. Weighing in at close to a tonne, this was not fun.
You have to expect a bit of damage, I got out of it with about $50 worth of stuff that needed to be replaced which I called a win. With all the packs unloaded and stacked in the house, it was time to start.

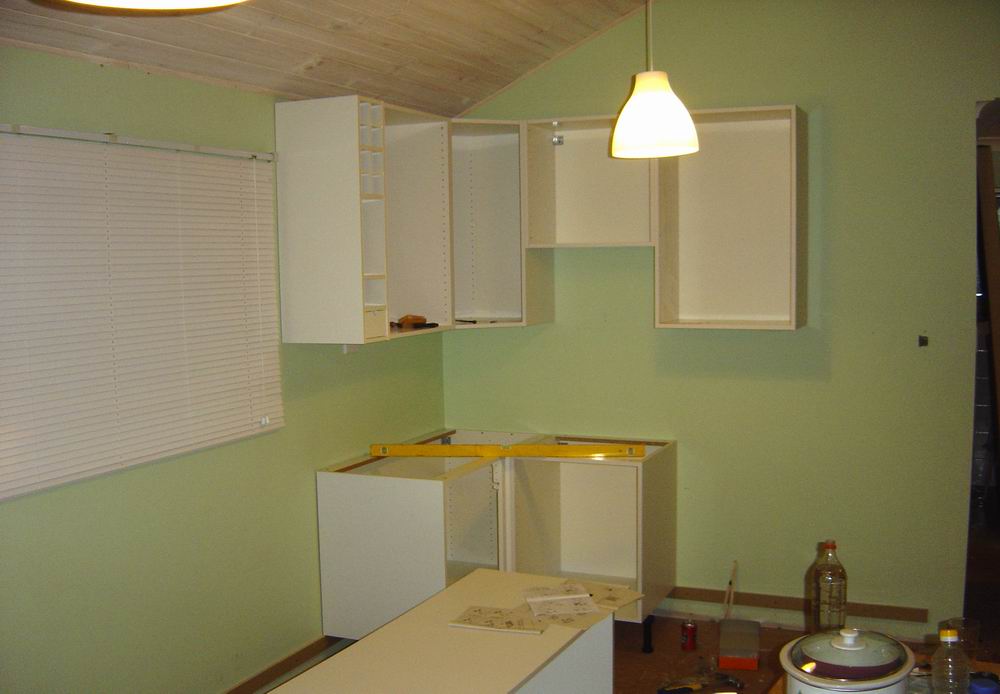
Start with the high cabinets.
It seems like a sensible idea to start with the overhead cabinets. Once again, being used to working with brick walls I had to come up with a plan on how to attach cabinets to the wall, given that wooden studs don't line up with exactly where you want to screw them to the wall. IKEA cabinets have a thin melamine back sheet so the attachment needs to be made from the side or top panels. So mounting needed to be done in specific locations. I noted over the years that other cabinets, I have since used Bunnings cabinets for instance, have a solid back so you could line up the attachment to be on a wooden stud.
But no matter, I used a technique I had already done through the house which was to screw a metal bar to the wall studs, and then screw the cabinets to the metal bar. The metal bar was 3mm thick, since I was going to be tiling the area the offset from the wall would be hidden. But in reality, silicone would do the job if you weren't tiling.
Working with low cabinets.
Follow the flat-pack instructions to build each carcass (the bare cabinet) and attach to the wall. You can see in the photo I installed a length of wood to support the cabinet while I was attaching it to the wall. This also acted to line the cabinets all up perfectly, and of course, I used a spirit level to ensure they were all mounted level. Once the cabinets were installed, the length of wood was removed and any screw holes could be filled - or in my case, be hidden under the tiling.
The low cabinets also get a length of wood against the wall, but this time it is permanent as the cabinets hide the mounting. The cabinets have adjustable feet for the front, you need to make sure you have the height set correctly for the kickboard that goes underneath. So carefully plan the length of wood against the wall, noting that the floor isn't going to be dead level, so give yourself at least 5mm to spare, once the kickboard is in place you can't see and gap. Your best bet is to have a bit of kickboard on hand and test as you go.
Note that I didn't put a metal strap on the wall. The floor cabinets sit on feet which takes all the weight. A few discrete screws through the rear bottom into the wood along the wall will keep it from moving around, and even just one or two screws into a conveniently location wall stud will be enough. Each cabinet, as you put it up, attaches firmly to the cabinet next to it which distributes all the forces across a greater area.

Oven cabinet.
My wife's plan was to have an oven at the edge of this area. So now you can see why I selected the height of the wall cabinets where they were. Before I started I had a good plan of all the dimensions. Work to your plan! I was super skeptical about mounting an oven in a chipboard (well MDF in fact) cabinet, but that's how everyone seems to do it. At the end of the day, with the oven installed, it did not get hot at all. Insulation in an oven is outstanding.
Note that the wall cabinets aren't as deep as the floor cabinets.

Heading past the sink.
Corner cabinets are tricky. Whoever makes your flat-pack kitchen will have some approaches, you can see in my wife's design the top corner cabinet has a 45° face, whereas the bottom cabinet was to be installed with an interesting swivelling rack. The rack is installed as a half-circle with a post, the rack can swivel out when the cupboard door is open, load up with gear, then swivel back in. It proved to be quite effective.
Sink areas require a bit of thought. My wife had opted for drawers where-ever possible, but under a sink a door is your best bet. We had made sure the belly of the double sink was going to rest inside a larger cabinet.

Coming along nicely.
Next to the sink I left a gap for installation of a dishwasher. Who wants to wash dishes when on holidays? You can see I had installed all the drawers and doors at this stage, but no bench top. We weren't satisfied with any modular benchtop we saw, so we decided to go with a custom made benchtop, once everything was installed and in place I would be able to measure up and get it built.
Thinking about trim.
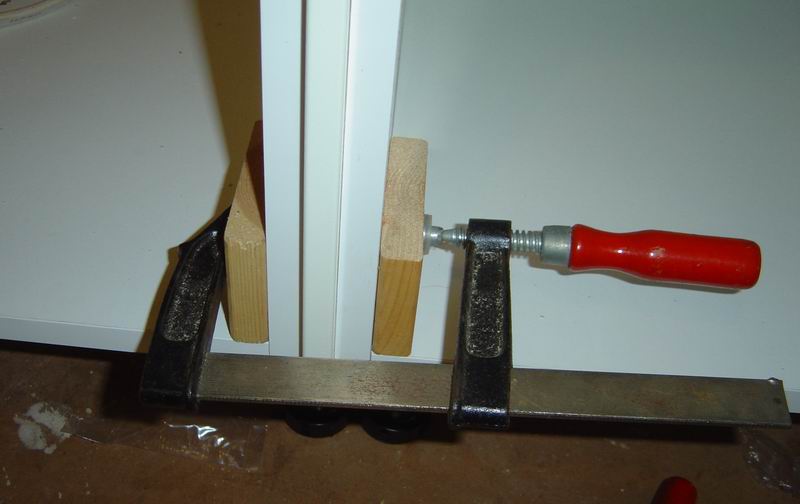
You need to keep your wits about you - there are places where you need to add trim to cover the cabinet body. For instance, look between the oven and the drawers next to it. There is a large area of the oven cabinet exposed. The flat-pack makers provide sheets of properly finished boards you install on exposed edges. They come forward of the base carcass so that when the door or drawer is closed it lines up. As you plan your flat back solution it will become obvious where you need these sheets, and you need to take their width into account in your spacings.
Putting them in place is just a case of wiggling them into position, firmly clamping, and screwing them into place. Not that I didn't bother using glue anywhere in the construction of the kitchen, screws are just fine.
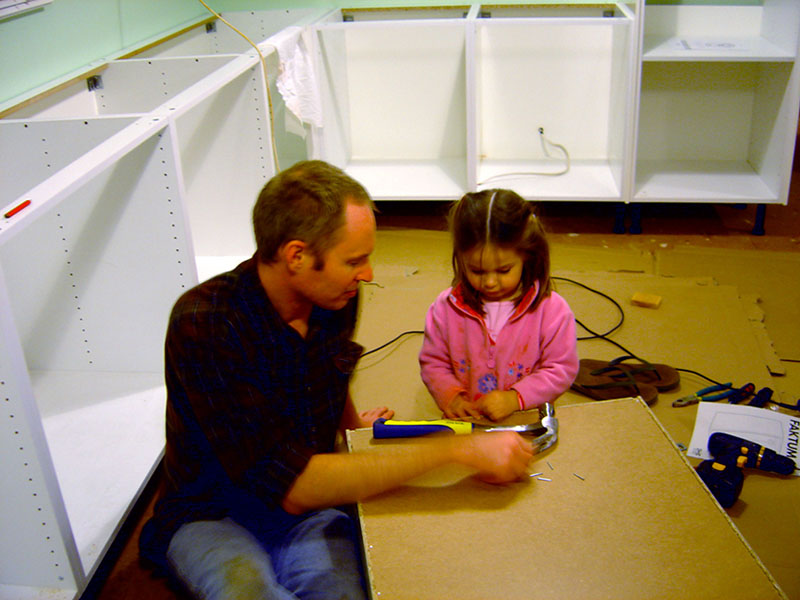
Kitchen builder assistant.
Plan ahead for electricity and plumbing of course. As I keep saying plumbing and electrics need to be done by licensed individuals, but you can certainly make their job easier by running cables. And if you do plan on doing it yourself for goodness sake know what you are doing. Burning your house down or killing yourself is not worth it, nor is flooding it. I would never work on a house without RCDs on every circuit.
We had planned an electric oven and an electric hob cooktop which required 15A sockets, so I ran a dedicated 4mm² cable for that. The microwave, the cooktop ventilation and the dishwasher all sit on a standard GPO circuit so they only needed a 2.5mm² drop. Water is much easier, everything comes in and goes out through the floor, so no planning required. One of the joys of having a house on stilts!
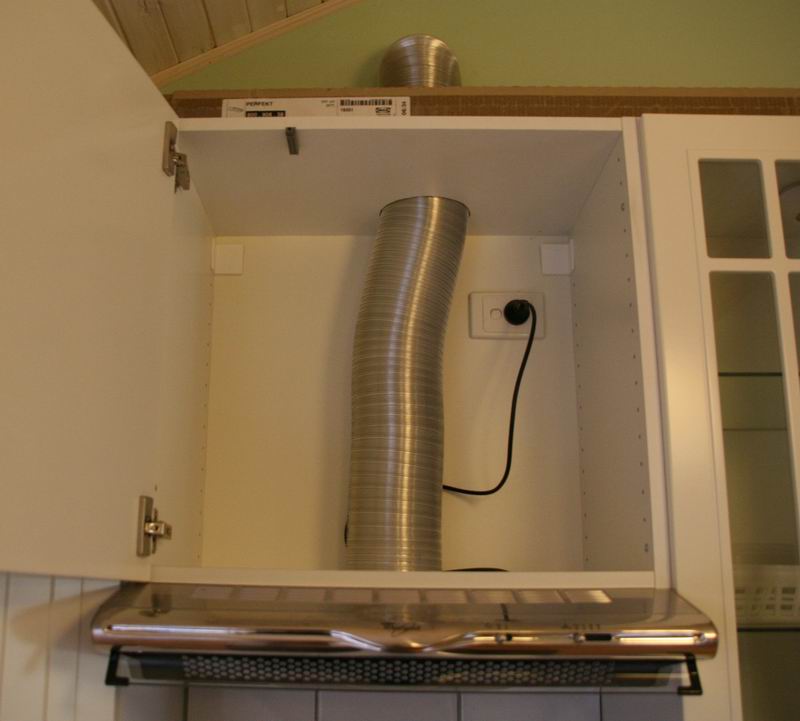
Cooktop ventilation.
The rangehood, again, was carefully selected to fit in the space, plan, plan, plan. I'm firmly of the opinion that you vent these sorts of things outside, you don't just recirculate the air around the house. Getting outside was an interesting problem for my cathedral roof area. Thinking outside the box, I used some flexible duct to go up the cabinet and then through the wall into the roof cavity where getting outside through the roof rafters and tin could be easily lined up. Note that the flexible pipe jumped to the right in order to line up between wall studs.
Afterwards I put on the stainless steel shroud that comes with the rangehood to hide the flexible pipe. I carefully cut it so a section fit inside the cupboard, and a section between the top top of the cupboard and the ceiling. That gives the illusion that the vent actually goes straight up through the ceiling, which looks much nicer than any other option!

Cooking area finished.
The workbench is a rolled edge melamine chipboard, I've used Proform here in Western Australia and they have never let me down. The L shape was two pieces, which they supply with a nice method of joining, using a bit of epoxy to really get it right. We had also designed in an island bench, which was 4 cabinets freestanding in the kitchen area which received a benchtop. The top overhung 250mm to make it an eating spot. The island consisted of nothing but drawers which was an excellent amount of storage space. The kitchen had 25 drawers alone!
A pantry finished of the edge, it was a pull out style larder. Although the idea is quite good, I found it a bit flimsy, it had plenty of runners but it never felt super solid. Acceptable, but not ideal.
Putting in the sink is just about having the nerve to cut a giant hole in your expensive benchtop. Sinks bolt down with a simple mechanism, no mystery there. We went with a water filter tap as well, although the house is on rain water there is a lot of "organics" in the water. Nothing better than filtered rainwater!

Job finished.
Installing the dishwasher is again straightforward if you have your measurements and plan correct. Plumbing connects in with the sink, and a powerpoint for electrons. Against the edge of the dishwasher was the only place where I had to add a "spacer". You can do all the measuring and planning in the world but your room is a certain size, or some appliance doesn't fit in. For this I grabbed a sheet of trim, cut it to the correct size, and with some chocks of wood screwed it into place, hiding the screws of course.
Kick boards go in following the instructions, and we put in some very fancy trim up the top of the wall cabinets. That is a case of getting out your mitre saw and cutting carefully, and screwing into place.
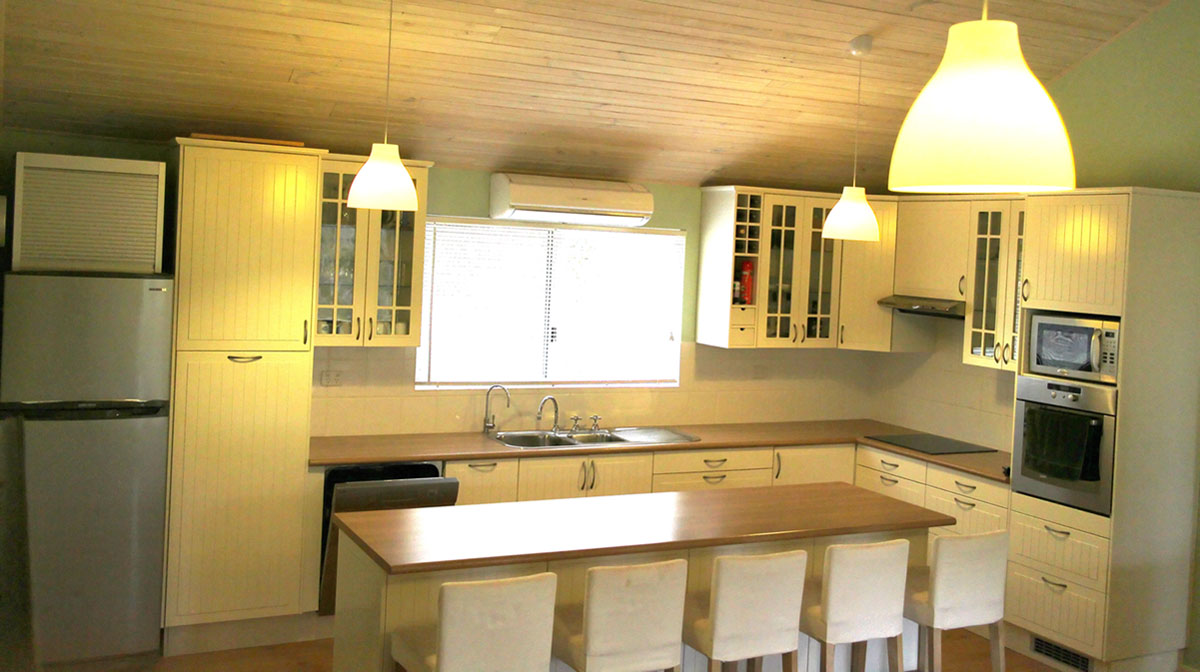
Tiling the area between the floor cupboards and the wall cupboards finishes the job nicer. My wife and I were very pleased with the end result, practical, beautiful and cost effective. A glorious kitchen!
Project Pemberton: Kitchen.