Continuing with the truss theme, the roof is a whole pile of trusses that the roof is screwed to. Well, nearly.
The demo home was exposed trusses under a pine lining in the main area and ceiling'd trusses in the bedrooms but with exposed trusses there isn't enough room above to get the minimum insulation in as required by law.
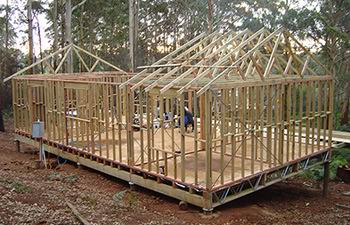
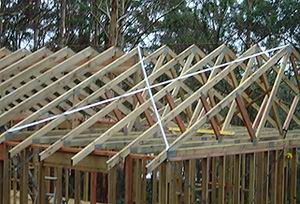
Trusses go up.
So for me, it was trusses on the outside, then standard ridge beam/rafter combination in the middle. That way the pine lining goes _underneath_ the rafters, leaving enough of a gap for insulation.
The roof trusses are awkward, but not that heavy. I put the two end ones in place, centred on the top plate, held by clamps and some temporary bracing. Then I ran a stringline between the peaks as a guide for the trusses in between.
Throw them up, space them correctly, check the plumb, bung a multigrip on either end and where they cross internal walls. Temporarily brace them to the previous truss.
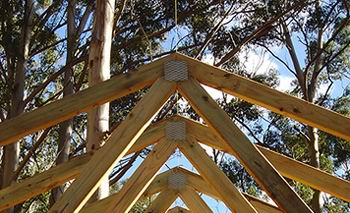
Stringline centreline guide
The multigrips, like triple grips, nail in 3 directions. The purpose is to hold the roof down in windy uplift conditions. Nails would just pull right out in the right storm, apparently.
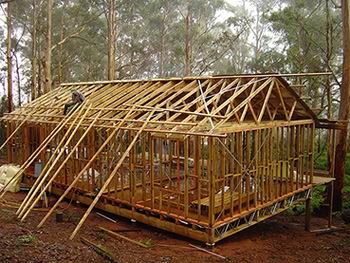
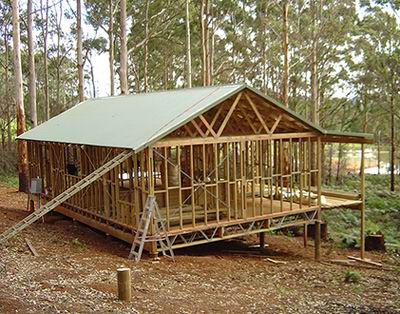
The centre trusses are a different configuration. This is so that the big glue laminated ridge beam (glulam beam) has something to attach to. Bit of a trick there, those trusses fit flush *outside* of the centre area top plate, reason being that you need the space to chock up the glulam and to frame the triangular sections for plasterboard.
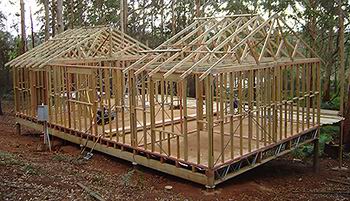
All Trusses in place.
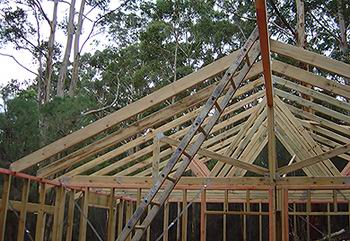
Dad and I decided that aliens did not actually build the pyramids after putting the glulam into place. Long heavy bit of wood that needs to be lifted 3 metres off the ground, two blokes, some rope - no worries. I'd made some supports for the glulam so that it would fit in the right place - exposed with rafters on top.
It was a challenge finding the right position, the rafters used were taller than the top chord of the trusses and so it was further down from the them. A combination of the rafter height, the pitch of the roof, some maths and viola - put it "there" ;)

Hoik the glulam up.
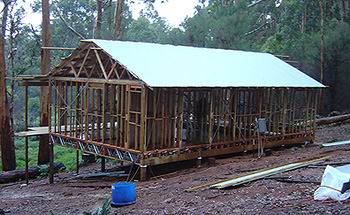
The ends of the rafters as they sit onthe top plate therefore need to be the same height as the top chord of the trusses, which also sit on the top plate. Otherwise the purlins (I kept calling them battens, the wood that runs across the top that the roofing iron screws down to) would not be flat!
Whatsmore, there is an eave on one side of the house, so the rafters there should be whittled down to the same height as the top chord otherwise it might look a bit strange.
But armed with the first cut as a template, it all went up pretty quick. Some multigrips on both ends, and some nail plates to attach the rafters where they join at the peak and its not going anywhere.
Trussed roofs need to be braced because there is no ridge and purlins alone will not stop them potentially skewing. Suffice to say, bracing the trusses is similar to bracing the walls, but without the tensioning.
Rafters too...
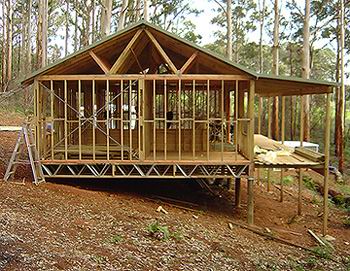
"Speedbrace" is used, it comes in heavier thickness flat lengths around 6m long. It is slightly bent like angle iron, reason being that it resists compression forces as well as tension forces. This is unlike the strap brace which is only for tension - and therefore must be used in pairs to "balance".
One end goes on the top plate, slightly down the wall, the other end on the truss, again to form a big cross, both sides. I double checked my plumb on the trusses as I bashed the speedbrace flat & nailed where it crossed the top chord of the truss - removing the temporary stays as I went.
Purlins are spaced with one at the bottom where the gutter will be, then one at the top where the ridgeflashing will be. Work out your distance between them and ensure that you don't exceed the maximum spacing. This was 950mm for me, so I went 700-900-900-900-700. Apparently it is a good idea to have the outermost spacing less to prevent bending the tin when you walk on it.
Truss bracing.
One thing I did get wrong was the eave purlin. There should be a purlin at the eave, sticking forward from the top plate, so that when you clad the building it buts up to it. I put it in line with the top plate. Doesn't affect the structure, but makes trimming that area more difficult.
Batten screws for the outer rows and two skewed nails on all other rows. Purlins butt join on a rafter. If your iron sheets are going to rip off from wind they will start from the bottom edges and will be happy to take your purlins with you. By screwing down the bottom and top you ensure that the purlins aren't going anywhere.
Last call, purlins.
Under the iron goes a foilbatt insulation. It's pretty good, comes on a roll. You cut off the length you need, get it on the roof, I rolled it back up to get it there, then let it unroll down from the ridge to the edge of the building. Then, get a sheet up, straight on top. It squeezes down the foilbatt where the purlins are, but everywhere else the batt take up the area.
Now putting roofing iron down - it's the worst job. I've done it a few times on pergolas and shed and there must be a trick I don't know. You put down the first few sheets, make sure they overlap correctly, are heading in the right direction, then screw them down. Why then oh why do I always end up with them creeping out?

Putting down insulation and iron.
I reckon the trick is to wait for a windless day, put *all* sheets down, jiggle them around until they are right, then screw them down. I however couldn't do that - for starters, the pitch of the roof is too steep and they'd fall off. Secondly, I put the iron up during a thunderstorm. Big tip - don't put up roofing iron during a thunderstorm.
The skew problem I decided was coming from the fact that the deck was not square, so I live with the fact that now each sheet ever-so-slightly "walks". It is hidden by the gutter so nobody except those who walk on the roof will ever see it, ie, me ;)
Don't forget to grab your pliers and on the top edge of the sheets bend the corrugated valley up. I forgot to do this on my pergola at home. What happens is if the wind blows hard enough it can blow the water back up the sheet and off the otherside. Which happens on my pergola :(
Very pretty, "colorbond" iron from BHP steel.
The deck is quite flat so it is doubly important to bend the valleys up.
Finally, I'd already calculated how "wide" the roof will be and centered it so that there was equal hang over the edges of the building. With the tin up, I cut all the purlin overhand off and installed the "barge board". This is a piece of wood that is nailed/screwed to the ends of the purlins and iron flashing goes over to trim off the edges. Plenty of mucking around to get it up because it is so high off the ground and awkward to measure/reach.
Flashing.
Finally, the ridge cap goes on the top. I was allocated a box of 1000 tek screws and by gee I meant to use them.
The edges of sheets got a tek screw for every second corrugation. Up from that I alternated between 2 and 3 teks per sheet per purlin. Thus, on the ridge cap, I was back to 1 tek screw per second corrugation, ie 5 tek screws per sheet. With two sides, that meant 160 screws. Even with my mates excellent & expensive DeWalt cordless drill I still required two battery charges and around 3 hours of labour.
But, as I put the last tek screw in I thought "I started with one tek screw, I am ending with one tek screw." Rrr-rrr-rrr-rhew.
Done.