Starting from an empty room, here's how you create a bathroom.
Prior to having the empty room, you need to have planned what plumbing and electrical fixtures you require. Before the plasterboard went up, I had run fresh water in for the shower, the bath and the basin. Water leaves the room in three places - a floor, the bath and the basin drain. I put one power point in the room for hairdryers and electric toothbrushes, a switch for lights and a fan.
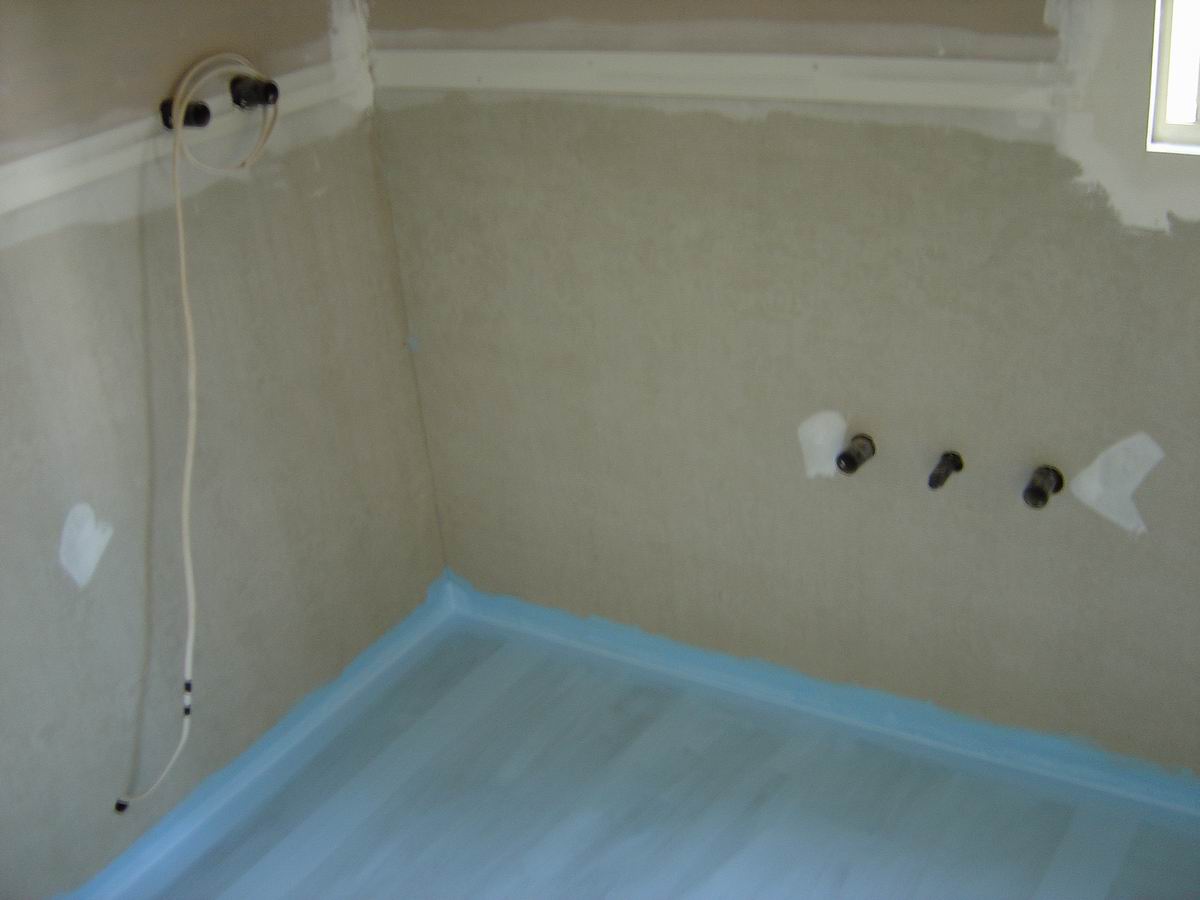
Room ready with waterproofing and plumbing.
As for the bathroom layout, we particularly wanted a spa bath. Since the bathroom is so small, we decided we would have the shower in the spa. In the very small space left behind we put in a vanity cupboard with a basin, and to keep it really tight we made the cupboard very narrow, around 300mm, and the basin mounted so that it sticks out forward of the cupboard.
Going right back to the start, it was suggested to me that in all wet areas don't use plasterboard on the walls but rather use fibre cement. So the entire bathroom, toilet and laundry area is 6mm "villaboard" fibre cement. Putting it up is almost exactly the same as plasterboard but being a bit thinner the door frames end up a bit "looser" against the wall. You don't notice unless you are specifically looking for it. The advantage of fibre cement is that if it gets wet, it will dry out without any damage unlike plasterboard, which when really wet, often there is not recovery.
The spa gets screwed to the floor, and attaches to the wall.
Speaking of stuff getting wet, waterproofing the floor is essential. Don't take any short cuts here! If like me you have dealt with water getting past tiles and into walls in the past, you will know what I'm saying. Firstly, seal the floor-to-wall interface with a filler. I used polyeurathane which is probably overkill, a good bathroom silicone would be fine. This is called the "bond breaker" and the idea is that if the interface between wall and floor moves it will allow the waterproofing membranes you add on top to stretch rather than tear.

Spa bolted down and pump placed.
So with the bond breaker down you put down a waterproofing membrane mesh and paint it on with your waterproofing glue/paint. Put membrane on anything that has an interface and may move. Wall-to-floor, wall-to-wall, even across the joins in the flooring sheets. When in doubt, add membrane. And then paint everywhere with your waterproofing goop. And then another coat. And then another. You probably can't put down too many coats. Follow the instructions on the waterproofing product you are using, but really make sure you have a good solid waterproof. If you didn't have a door, you should be able to fill up your bathroom with several centremeters of water and it won't go anywhere!
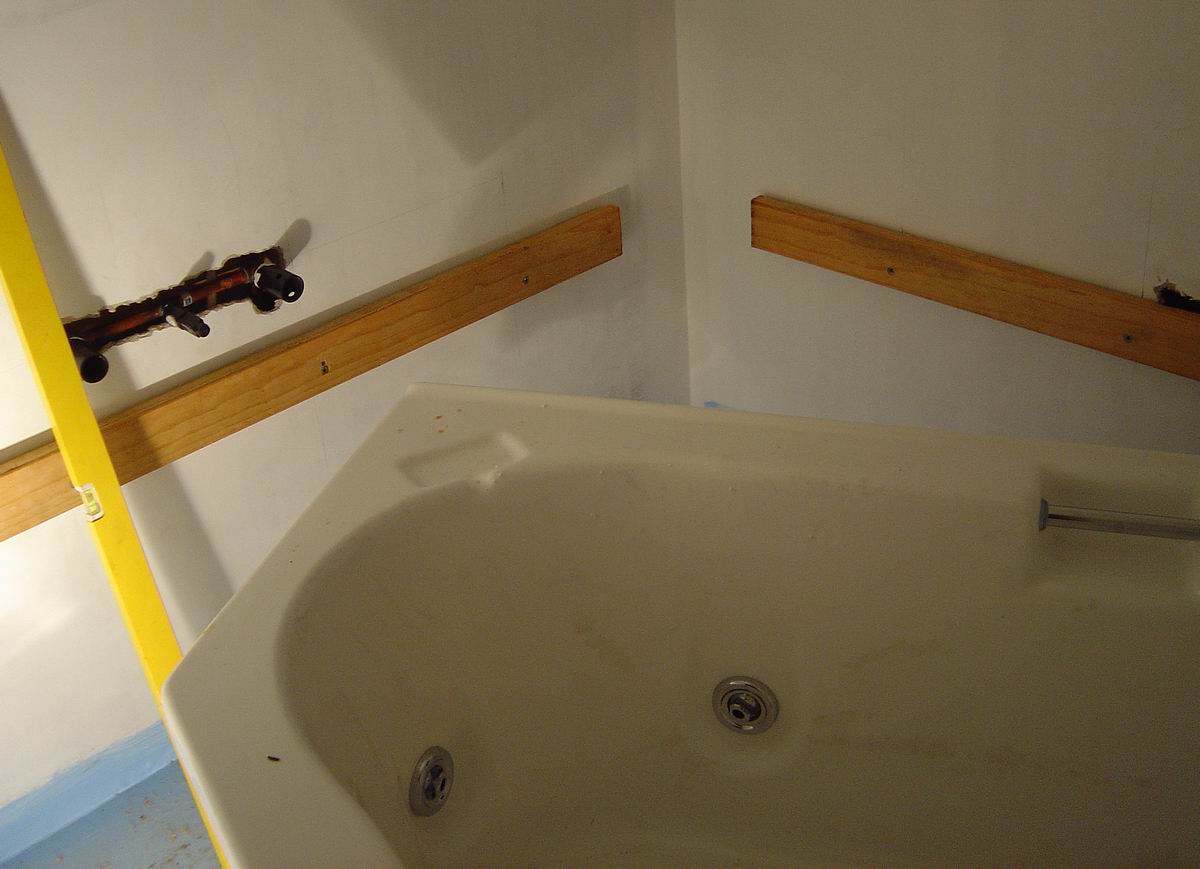
Frame the front.
Getting the spa into the house without damaging anything by myself was no mean feat (slaps self on back for good job) and bolting it down was not easy either. The spa comes with a basic metal frame and adjustable feet and that's about it. All other attachments is up to you. Because I was working with a really small area, I wanted the spa hard up against the wall. Generally you would build a platform all around the edge and the spa edge sits on top. I instead cut some wood, routed a lip into the edge that the spa would tuck into and bolted it hard to the wall. So with the spa height adjusted (spirit level), bolted down (don't forget to waterproof where the bolts go in) and sitting snuck in the wood lip around the edge you now have a really solidily mounted spa.
Note that before you turn the final bolt down, make a mark in the floor where the drain will be and cut a hole. The drain pipe will be 40mm, so give yourselt some room for movement. Later on you can seal the hole with some space filler.
Panelled in.
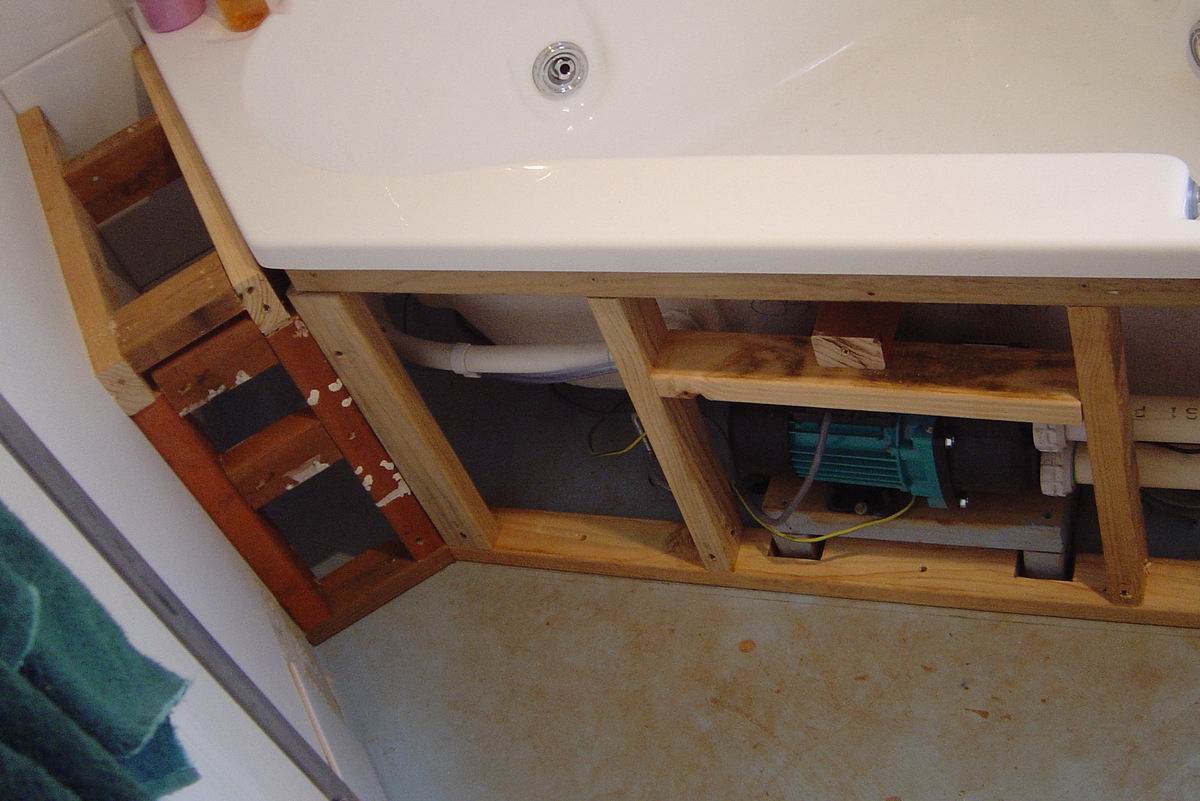
The spa pump and plumbing is an interesting puzzle. I had plenty of options of where to put the pump. Underneath the house, outside, in the room somewhere...each had their own issues. Underneath the house was my least favourite option, because then there is no run off. As in, once the spa has water in it, water goes down into the pump, and when you empty the spa, there the water stays. Euw.
Outside meant I'd need some sort of metal box to put it in and to run pipes to and from. The metal box would then need to be in the way somewhere outside. And I'd have to keep thinking about runoff.
Luckily, I found that I could fit the pump nice and snug, with full water run off, within the spa zone. Means that when it is running it will be loud as it is right there, but the pump will be drain out with the bath water. Much nicer.
The pump gets plumbed in with pressure glue using 40mm pressure pipe making sure the pipes all have "run off". The pump is wired in, I put it on its own circuit breaker. The switch on the spa is a vacuum pipe...you'll work it out. I framed in the front of the spa with wood (waterproof as I went), and the small space next to the spa as the spa was not wall-to-wall. To finish, I made some panels out of fibre cement. The side panels are screwed on, but the front panel I made so it is removable in case you ever need access to the pump. It is siliconed on the sides, so you'd have to cut the silicone to remove the panel, and then re-silicone to put the panel back in place. I was quite happy with the job.
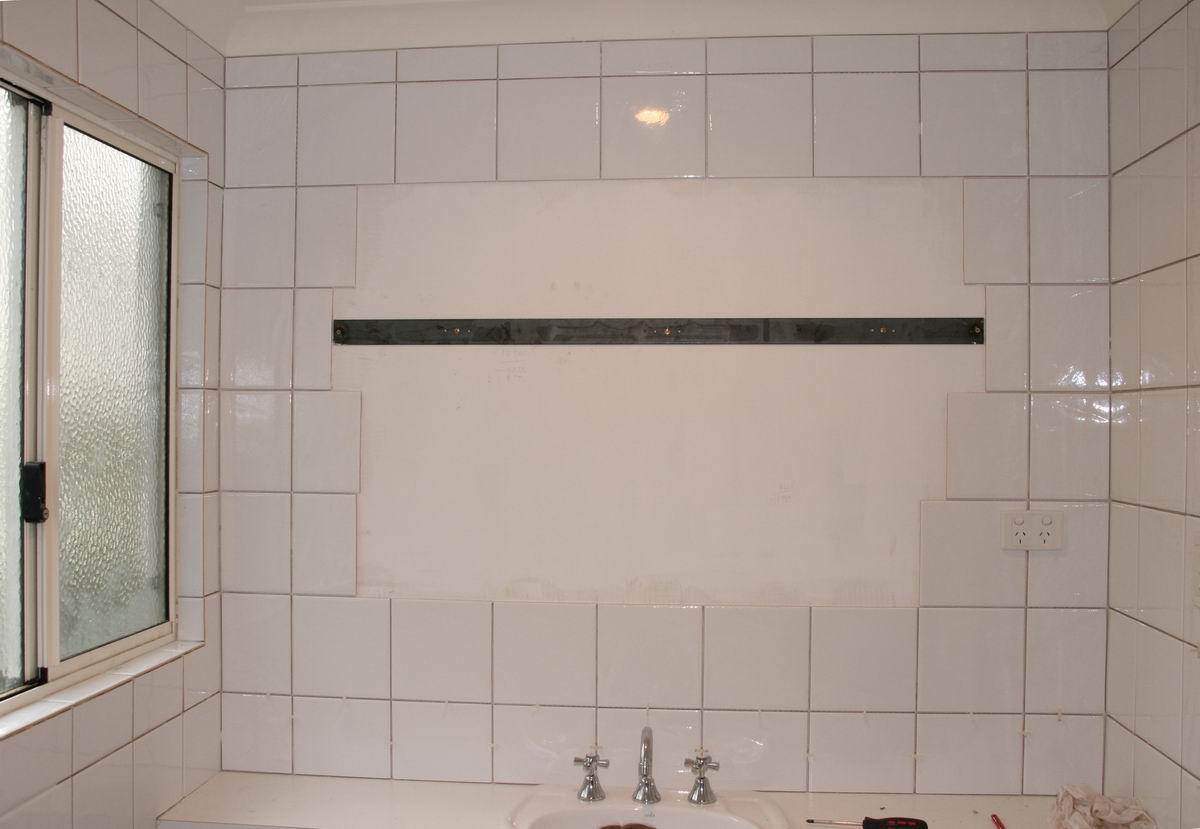
Tiling and bracing for a mirror.
Meanwhile, we decided to fully tile the room floor to ceiling. Tiling is one of those jobs that you can do pretty easy if the tiles are a convenient medium size. Big tiles are harder to do. Get yourself a reasonably good tile cutter, have a diamond blade for your angle grinder for the fiddly bits, a glue spreader and tile spacers, and get cracking. Think about your layout, don't just start on one wall and go. If you look carefully at my pictures you can see that I've centred the tile cuts in the basin wall and I made the spa spout centred in a tile. If you just start on one wall you might end up with slivers of tile on one end which looks awful. Take your time, measure, layout, think first. Yes; you will need to do more cuts. So what. You will get a nice look, like you care.
Each time I tile I seem to go tighter on the spaces between the tiles. The first tiling job I ever did was 3mm. Yeah, nah, never again. Grout gets dirty. Go close, these days it is 1.5mm if that.
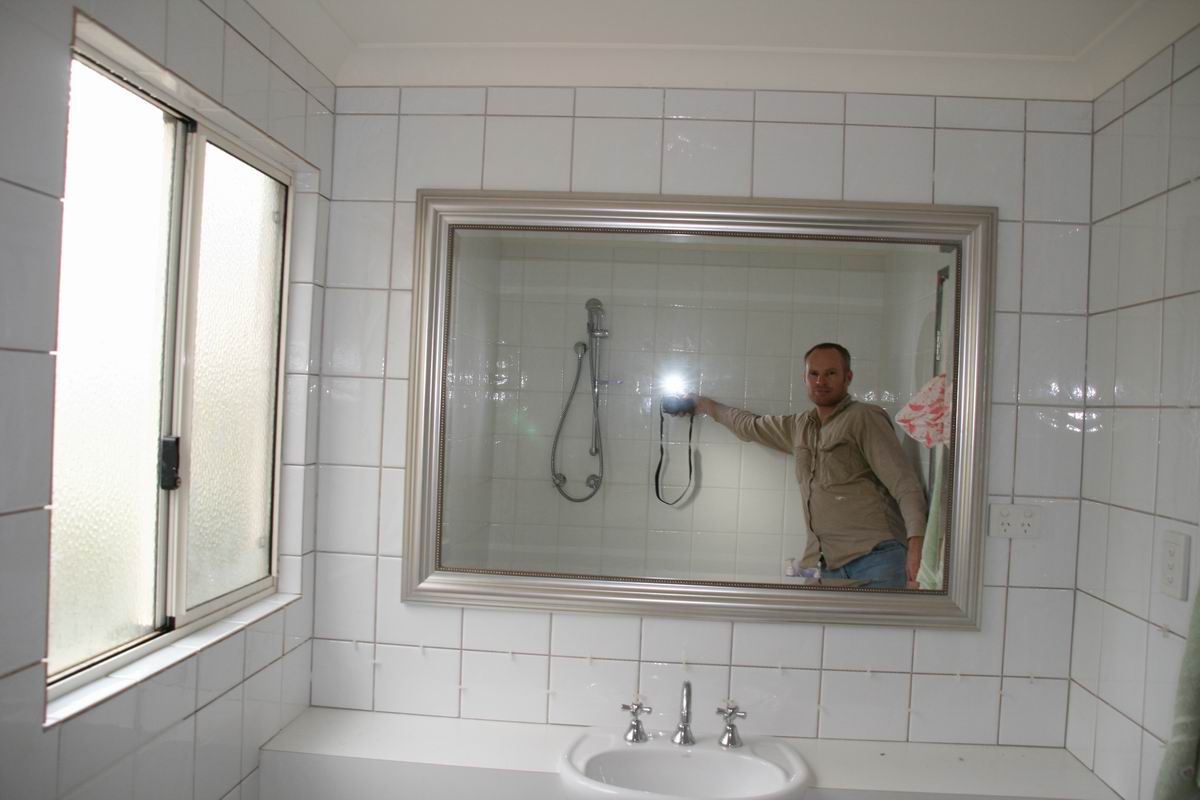
And mirror hung. "Hi there". Mmm, I've lost weight since then.
And get into the window as well. Think about the exposed tile edges. You don't want to have cut edges exposed. If you are really good, mitre the edges. Heh. I've never mitred a tile, sounds like hard work.
I screwed a mirror on the opposite wall; all bathrooms need a mirror. The missus had chosen a nice one, I wanted it centred, so how on a stud wall do you mount something heavy like a mirror? There are a couple of ways, I went down the path of screwing a metal bar to the wall, and then attaching the mirror to the metal bar. That way, armed with your stud finder, you find the studs, put the screws in where they need to be, and then the mirror can be as centred as you like on the metal bar.
Note that I didn't bother tiling behind the mirror. It's a permanent fixture. Up to you.
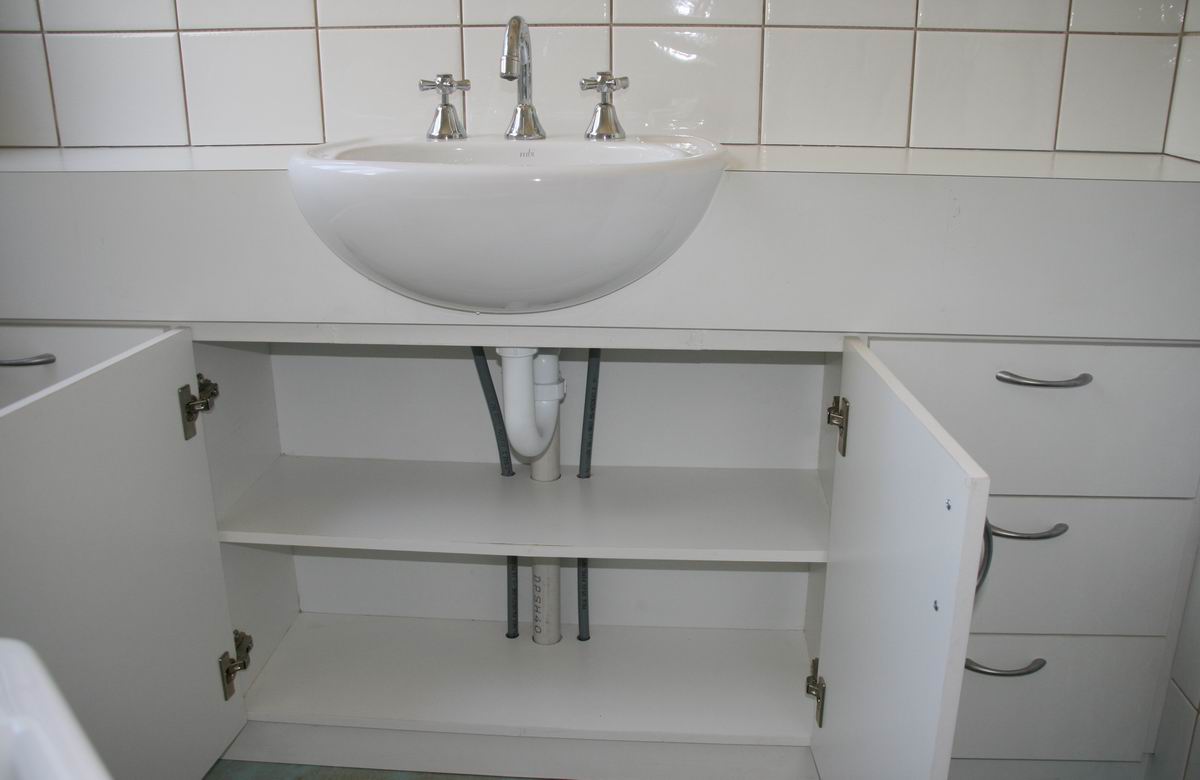
Basin in cabinet.
In 2007, cabinet making wasn't dead. There were still such a thing as cabinet makers, and they would make you a cabinet. But even back then I could see that cabinet making was dying, being replaced by flat pack style cabinets. Look I'm all in for flat packs, they are cheap and really good quality these days, and modular...but modular means you won't get one 2.47cm exactly wide. And if you only wanted something 300mm deep but they didn't make it, also out of luck. And if you wanted a deep benchtop to fit a partially exposed basin - then it has to be custom.
So in 2007 I faxed (heh, faxed) a cabinet maker a general arrangement of what I wanted, and he made it. Carted it down there and whaddaya know - it fit perfectly, just as I wanted. I tiled up to the edges and that was pretty much it. Mounting the basin was a bit tricky, but plumbing in and out was simple. Under the house it was the same case as the trough for the drainage, and the water supply followed the same deal.
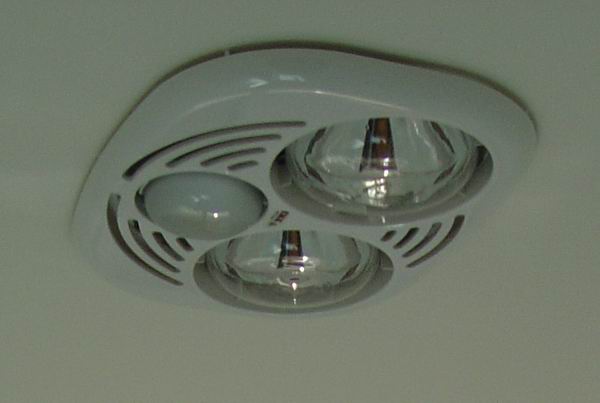
Combo light, heatlamp, exhaust fan.
Pemberton gets cold and damp, so I liked the idea of a heater in addition to the light and the exhaust fan. I found a combination unit and wired it in. The big lights are 500W each so there is plenty of heat given off. The exhaust fan needs to exit the house. You can buy yourself a length of tube with a flange on one end, use a plumb bob to work out where the hole in the roof needs to be, cut it to length and mount a tin hat on top. Funny, no matter how many times I've tried, I've never quite managed to get one exactly vertical. Close enough though.

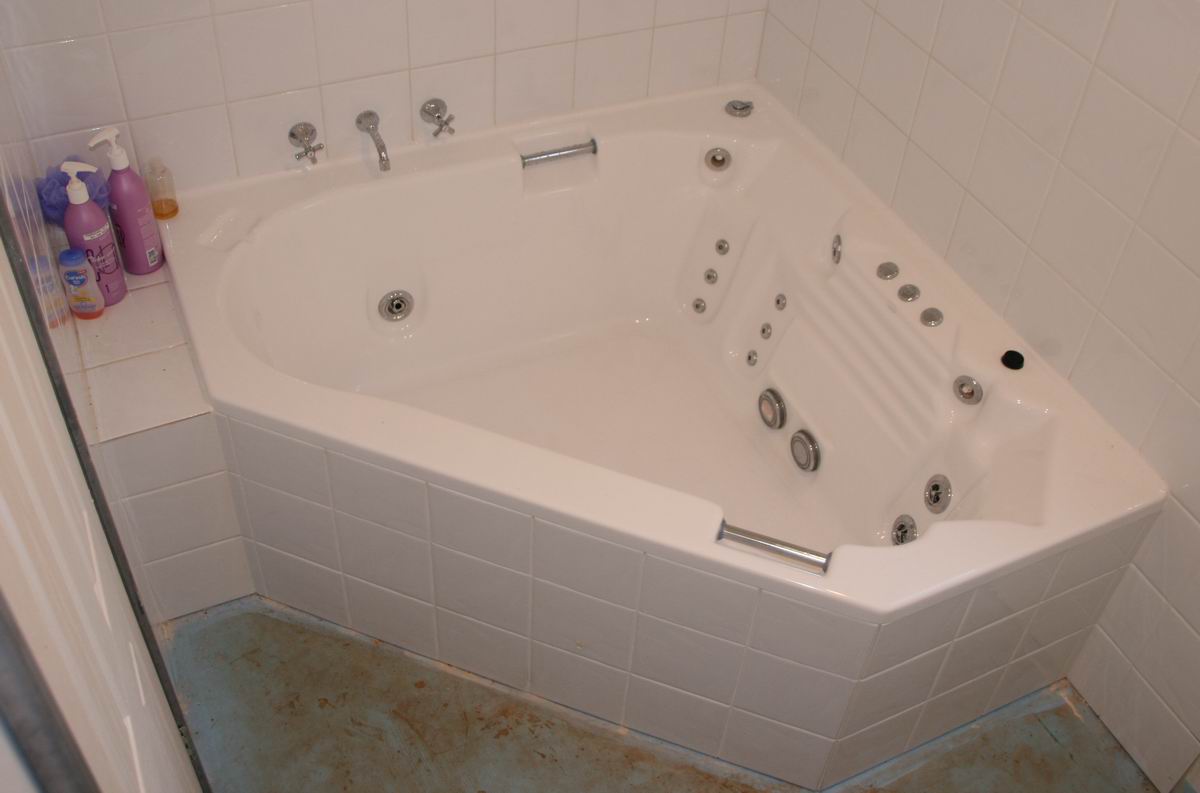
Finished bathroom.
Overall the bathroom result is excellent. For such a small room it has a very exotic spa, a shower (although you need to stand in the spa for it) a basin, wall to ceiling tiles and a tiny bit of standing room to work around.
You can't do much more than that!
Note: the floor needs to be sloping inwards so that if say someone leaves the basin overflowing and walks away, the water won't leave the bathroom it will drain out through the floor waste. Since the floor is flat boards, I achieved this "wet area containment" by putting a 3mm tapered strip at the entries to the wet areas and painting the waterproofing over the top.
Note: when installing a floor covering you want to make sure that the floor covering is also water resistant, if not waterproof :-)