Putting up plasterboard - that stuff that you look at when you are looking at the internal walls of your steel or timber house - has been done for a long time, and the methods are pretty standard these days. You probably noticed on the previous page some completed plasterboard. Let's discuss!
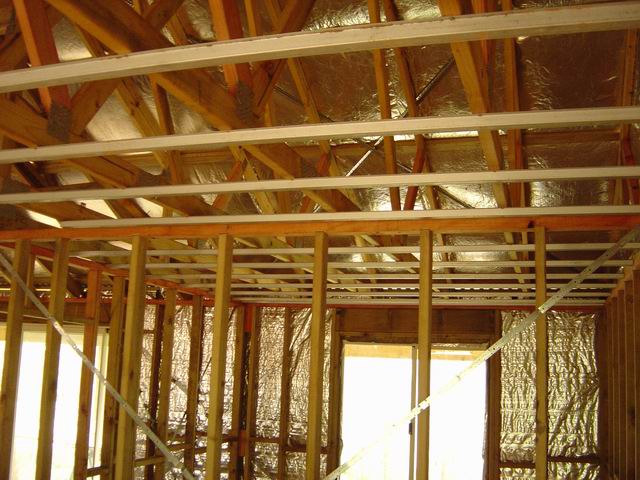
Furring channel is screwed underneath the bottom of the trusses, not just for something to attach the ceiling to, but also to rigidify the bottom chord of the trusses.
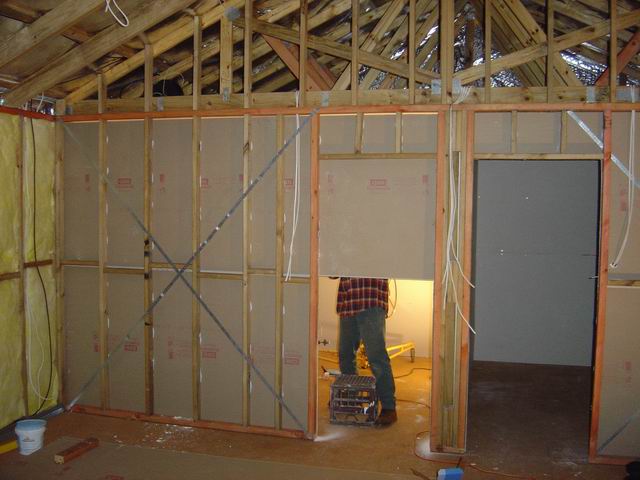
Once you have run all the electrical wiring, the plumbing, and anything else that needs to be concealed in the walls, it's time to make the walls look like walls. A long time ago plastering walls, in a timber framed house, would mean putting up some sort of meshy/horsehairy matt, mixing up some plaster in a bucket and slapping it on; finally smoothing it off for a nice finish. Sometime, I don't know when, <american accent>"drah wahll"</american accent> was invented. Dry wall meaning sheets of wonderfully flat already dry plaster between two layers of cardboard to give it some strength. I prefer to call it plasterboard but in Australia the company CSR has achieved the marketing holy grail - people refer to plasterboard as "Gyprock"; the CSR brandname for plasterboard (which can backfire, if a term becomes so ingrained it can lose its trademark right, but that's another story.)
The other main manufacturer, Boral, hardly gets a look in; being an anti-conventionalist I decided to give them a go but they were more expensive and harder to get delivered, so "Gyprock" it is.
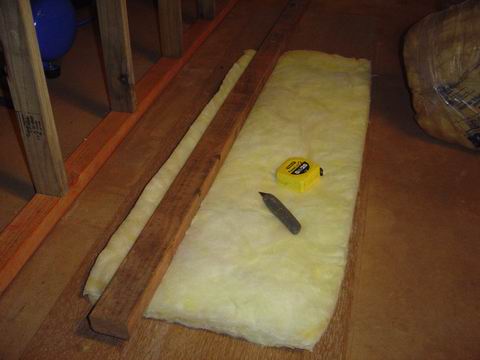
All the external walls get a nice R1.5 fibreglass batt added. Use an arrangement life this and cut them with your knife to size down the straight edge of the wood.
Firstly, I went with two products not just the one; 1200mm wide chamfered edge standard 10mm thick plasterboard "Gyprock" and 1200mm wide chamfered edged 6mm thick fibre-cement "Villaboard". I chose the more expensive fibre-cement product for the wet areas; being the bathroom, toilet and laundry. Basically if water gets into plasterboard it's stuffed, whereas if water gets into fibre-cement it's okay. I liked the idea that if, say, the plumbing burst or a room was flooded or anything that would get water into the walls I wouldn't have to replace the plasterboard. Note that once plasterboard is painted water isn't going to get through - it was more the water getting underneath and up behind the cardboard I was concerned about.
Estimate of sheets required.
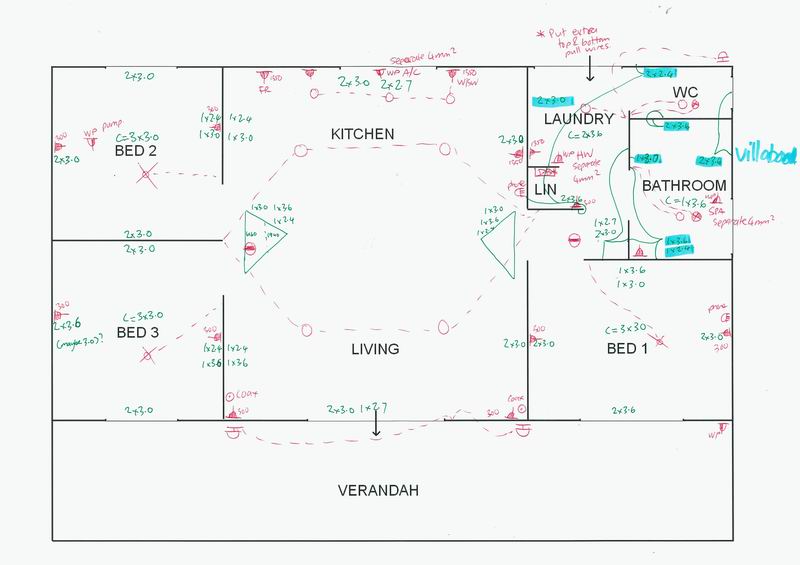
Grab a copy of your plan and start quantity surveying. Say you have a bedroom that is 2.6m x 3.4m, you need to decide how many sheets you require to do that room. The maximum length sheet is 6.0m so yeah, great, you could buy 6 sheets of that and cut it up. Let me tell you however that *do not* try to handle sheets that long, it is too too hard to handle! Not to mention it is not incredibly strong either, it *will* break under its own weight. I have first hand experience. It is and excellent cheap material for walls but handle with care.
So for my target room of 2.6m x 3.4m, and knowing that the standard 1200mm wide lengths are 1.8, 2.0, 2.4, 2.7, 3.0, 3.3, 3.5, 4.2, 5.4, 6.0m, I will need for the ceiling (depending on which direction the ceiling battens are) 2 and a bit 2.7m lengths or 2 and a bit 3.5m lengths. You cut the excess off. Okay maybe wasteful, but remember how hard it is to work with long sheets.
For the walls, remembering that a room is 2400mm high so two sheets on their side make up a wall, you need 4 x 2.7 for the short wall and 4 x 3.5m for the long wall. But wait, there is a 810mm door in the short wall! So one of those sheets can be 2.6 - 0.8 ie a 1.8m sheet. But wait, there is a window in the long wall! Well, since the window is in the middle of the wall there isn't much you can do; leave it. The number 1 rule in deciding what length sheets to use: it is easy to finish off a horizontal join (that's what the chamfer is for) but *really* hard to finish off a vertical join. You can do it, but keep them to an absolute minimum.
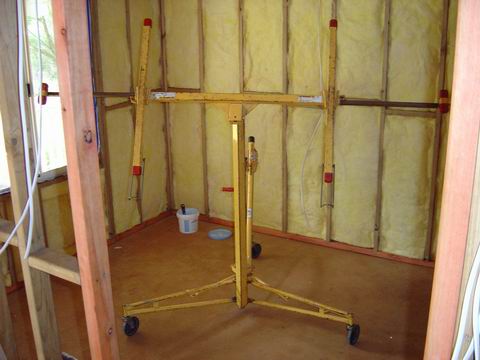
Insulation installed. In this picture you can see the plasterboard sheet lifter - put a sheet on, wind it up against the ceiling, drive some screw into it while it is held in place.
All my sheets were delivered on the back of a flatbed truck from Mitre 10 Manjimup and James, the delivery guy, who also happens to be one of the owners helped me unload the sheets and stack them in the house. There was over two tonnes of sheets. They are awkward to carry and we had to walk down a hill, up a ramp, around a corner and into the house. He is fit and strong, I'm not that fit, only averagely strong, and already worn out from days and days of work. He wanted to get back to the shop ASAP. He worked me hard ;) If you have a bad back then think about it - make sure there are people to unload the truck for you or you'll be in trouble. Delivery was cheap at $AUD40, because I helped unload.
Think about where you stack it. Don't put the first sheets you are going to need on the bottom, and don't stack them where you are going to start working!
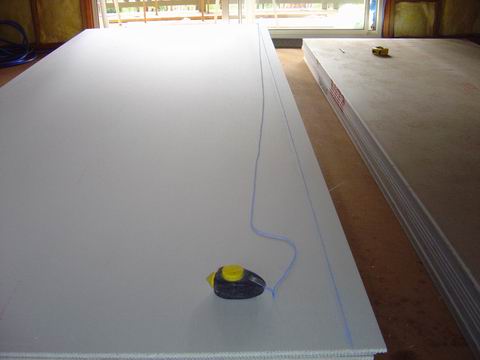
Cutting plasterboard is a "snap". Use a stringline, run a knife down the line (straightedge not necessary) and bend the sheet at the cut. It will snap easily. Turn on side/over and knife the other side. Done!
Now through yet another set of fortunate circumstance, one of my neighbours is an ex-plasterboard installer. Not only did he lend me a sheet lifter, a depth setting drill but he did all the flushing and cornice work. Flushing? That's after you have installed all the plasterboard you put mesh across the joins, apply a tough basecoat to lock them together, then a light topcoat that can be easily sanded back to be flush with the sheets, hence, "flushing". It was only 2 days for me to put up the plasterboard, but it was over 2 weeks of fulltime effort for him to flush the house - more time than I had available.
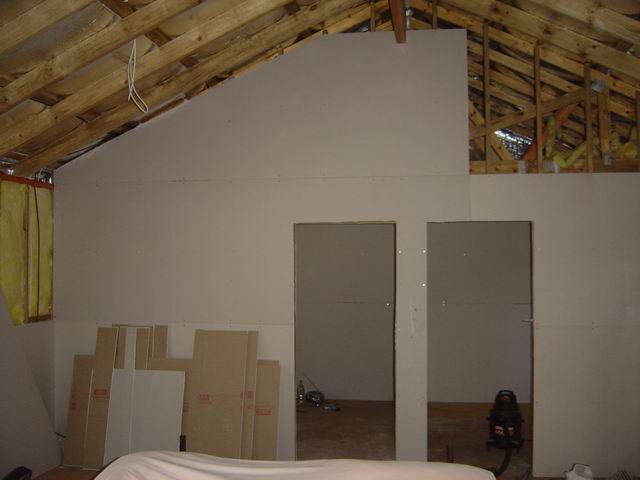
Put up the ceiling first, this is where the sheet lifter comes in handy. Cut the sheet to the desired size. Leave say 50mm on the edges, it doesn't need to be a tight fit as the cornice will cover up the gap. Dab some blobs of stud adhesive (glue) on the furring channel - the bit you are going to attach the plasterboard sheet to. It is actually the stud adhesive that holds the sheet in place, but until it is dry you need some screws to keep it there. A sheet is loaded into the lifter, on its side. The lifter then flips it so it is facing up, and you wind the lifter up. The sheet should be installed light side down - so the chamfer is on the flushing side. I have heard that people have had this the wrong way around! Once it is close to being in place, move the lifter (it is on wheels) so that it is in the corrrect position. Wind it until it is pressed against the furring channel.
Olde man saws up the door frame...
Now put some screws in! I bought 2000 plasterboard screws, they are about 25mm long, wood self tapping and countersunk. They go into the tin metal furring channel easy and wood even easier. At first I was using a depth setting drill, but I had to return it so then switched to a cordless drill with a screwdriver bit in it. After the first 100 screws you get a feel for how far you should screw them in. Just below the surface so when the board is flushed it will be hidden. You can easily overscrew them straight through the plasterboard so be careful. Professionals use a special plasterboard gun that has a self loading magazine of screws. Just keep pulling the trigger and another screw pops out, screwed to the right depth, reload for the next one. Fair enough if you do it every day.
...process is repeated on the other side.
Along the chamfered edge of the plasterboard you can put as many screws in as you like, they will all be hidden when the joint is flushed. However anywhere else on the sheet requires them to be individually flushed, so take it easy. A few down the middle will be fine - there is a faint line down the plasterbaord to guide you where the middle is.
Move on to the next sheet, butt it up hard against the first, you shouldn't see any light down the gap.
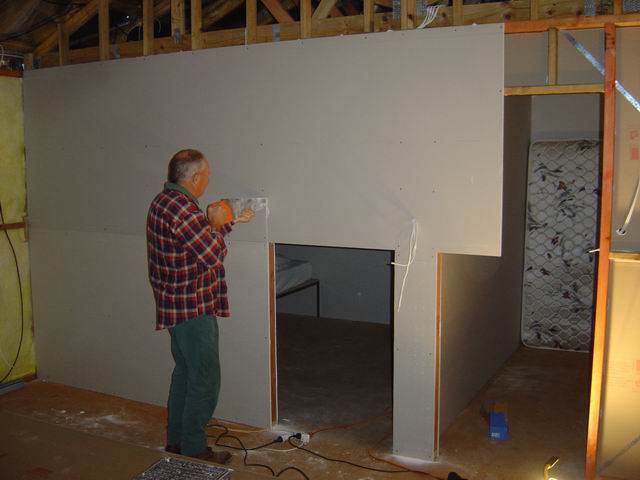
After the ceiling is done, start on the walls. Same rules, dab on some stud adhesive (you don't need quite as much for the walls, follow the directions on the bucket), push the sheet into place starting with the floor piece, then bang in some screws to hold it in place. The second sheet place on top, it will sit nicely in place while you screw it. You can probably do all this by yourself but I had good 'ole Dad helping out yet again.
Some areas get a bit trickier.
Windows and doors - whack on the sheet whole, then cut out the piece with a woodsaw. For say the door pictured, cut up the two sides, scribe the top line with your knife, push the piece forward to snap at the cut, then cut the cardboard on the other side. Easy! Yes, the wood saw will also work on the fibre-cement, but don't ever plan on using it for wood again, it will get very blunt very quickly.
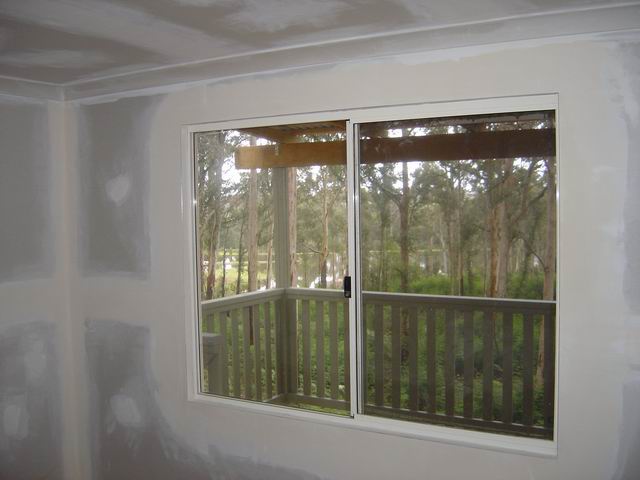
That's about it. Just plod your way through; keep your brain switched on, make sure that where-ever possible you don't put in any vertical joins - hard to flush. Around windows I put in little strips that butted up against the window frame, seeing as the window is recessed. Tedious work but the finished job is nice.
Flushing is easy...when someone else does it!
Very quickly you move from looking like a shed interior to looking like a house full of rooms; it is quite satisfying! About 2 days of solid effort, $AUD2500 (2005) worth of plasterboard, glue, fixings and finishing coats, 2000 screws - you are there.
Flushing and cornice work was the easiest by far. I gave my neighbour a key, and when I returned 6 weeks later it was done and I was $AUD1500 lighter ;)
If you had plenty of time you could take on the flushing yourself. My neighbour was an expert and it still took him 2 and a bit weeks of effort. It would have taken me 2 months I reckon!