Apparently the stud wall technique was developed by the Americans in 18xx. It's a simple, effective, fast and cheap construction technique.
A wall consists of a bottom plate, studs being the vertical members, noggings being the small horizontal pieces between the studs, and the top plate. When you have constructed a section of wall, you then simply nail it to the floor.
The bits of a stud wall.
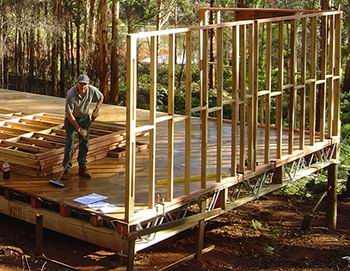
For me all the stud walls were assembled in the same truss factory that did the floor and also the roof. Makes the kit quicker and easier to erect. 25 sections of wall, numbered, with a diagram showing where they go - just stand them up!
Walls go up.
This is the time when you get out your *good* quality spirit level. From now on, everything you do affects "plumb", where "plumb" means standing directly upright/vertical. "Level", ie horizontal; meaning marbles wont roll off it. "Square" means everything on the ground is exactly parallel or at 90 degrees to each other. Some important terms I learnt along the way.
I stood up all the external walls first. It was a reasonable approach as there was only one internal wall run that I had to jam in between. Do yourself a favour and buy 20-30 of those cheapy Chinese made 200mm F-Clamps at $AUD2.50 (2003) each. I had around 20 of them and could have used more. From now on also, clamp everything prior to nailing - nail only when you are *sure* or have run out of clamps ;)
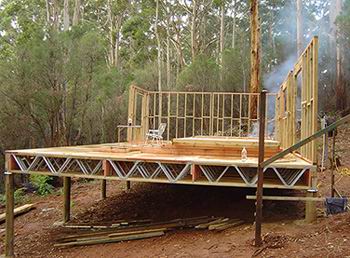
More walls.
Did I mention spirit level? Plumb everything up, again and again. Everytime you stand up another piece of wall, think about how that is going to affect the plumb of other walls and recheck that plumb. Make sure that you get the walls square - tape measure or giant T-square you can check the angles. It's pretty straight forward really, look at your plan, measure the distances, stand up the walls in the right spot.
When you run out of clamps, bang a nail into the bottom plate and into the floor but don't knock the head right in until you are absolutely sure its firstly square, and then plumb. If you find you made a mistake, you can pull the nail out, move it, and bang the nail back in. Seeing as we are working with wood there will be bows and warping - deal with it. Some of my frames had skewed from the delivery, put them in a situation where you can clamp them up together to de-skew them. It's only wood, it will pull and twist to your command.
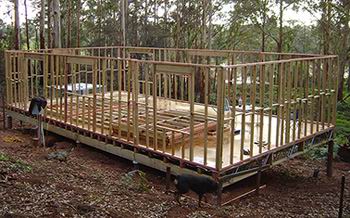
Yet more walls.
It took about 30 minutes to stand up all the internal walls. I then spent 4 hours mucking around to get them square and plumb. Check for plumb on several studs, don't just trust one, the wood might be bowed.
Finally, I banged the first nails in, whipped out the nailgun and went to down unloading magazine after magazine to hold it down. Always skew-nail, as in, on an angle away from the verticle. It is pretty hard to pull up a piece of wood that has been skew-nailed.
Note that on corners, and where internal walls join, there are 3 studs. Pay attention to which way they go, I was stumped for a while on one wall which I was sure was the wrong size until the Olde Man pointed out I was butting the corners up the wrong way around...
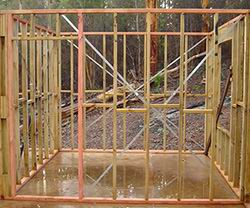
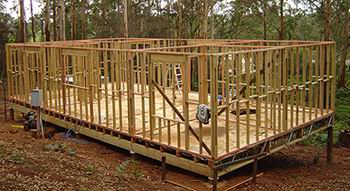
Wall strap brace.
All the walls are standing and nailed into place. Roll out the strap wall brace. The engineering drawings show where wall bracing is required, it goes on load bearing walls. Basically you put up crosses of the magic strap brace, and tension it.
I started at the top plate, one nail in, pull to the bottom plate, cut and put more nails in on the ends.

Applying some tension.
Now I put in on some tensioners. One for each cross to pull them nice and tight. Then, I check plumb. If it is out a bit, I add another tensioner to the diagonal that is going to pull the wall further into plumb.
I keep adding tensioners until it is pulled into place. I'm not sure if this is correct, but it worked. Once tensioned, I knocked nails into the strap where it crossed a stud or nogging making everything tightly held in place.